
Creating custom widgets in the back office
A custom widget is an interactive card that can appear on dashboards and resource pages in the back office. Like system widgets—such as charts, counters, and maps—custom widgets display content and visuals you define.
In this article, you'll learn how to create custom widgets in the back office.
Before you start
To create and manage custom widgets, you must have one of the following roles: Org admin (Global or Operator type) or a custom role with the appropriate permissions.
How it works
To create a custom widget, first install the Custom widget app. Each instance of the installation creates a separate widget and requires configuring what it displays and how it looks, e.g. layout width and height.
Each custom widget is displayed inside an iframe—a frame that embeds another web page within the page. This allows you to display external content, such as reports, maps, or applications, directly in the back office without leaving the page. The iframe loads the URL you provide and shows its content inside the widget area, while keeping it isolated from the rest of the system for security.
After saving the configuration that includes the URL to embed, add the widget to the dashboard or resource page where you want it to appear.
Creating a custom widget
NoteAll fields marked with a red asterisk (*) are mandatory and must be filled in before you can save the widget.
To create a custom widget:
-
In the back office main menu, go to Marketplace > Catalog.
-
Find the Custom widget app and click Install.
-
In the modal that opens, enter a name for the app instance and click Install.

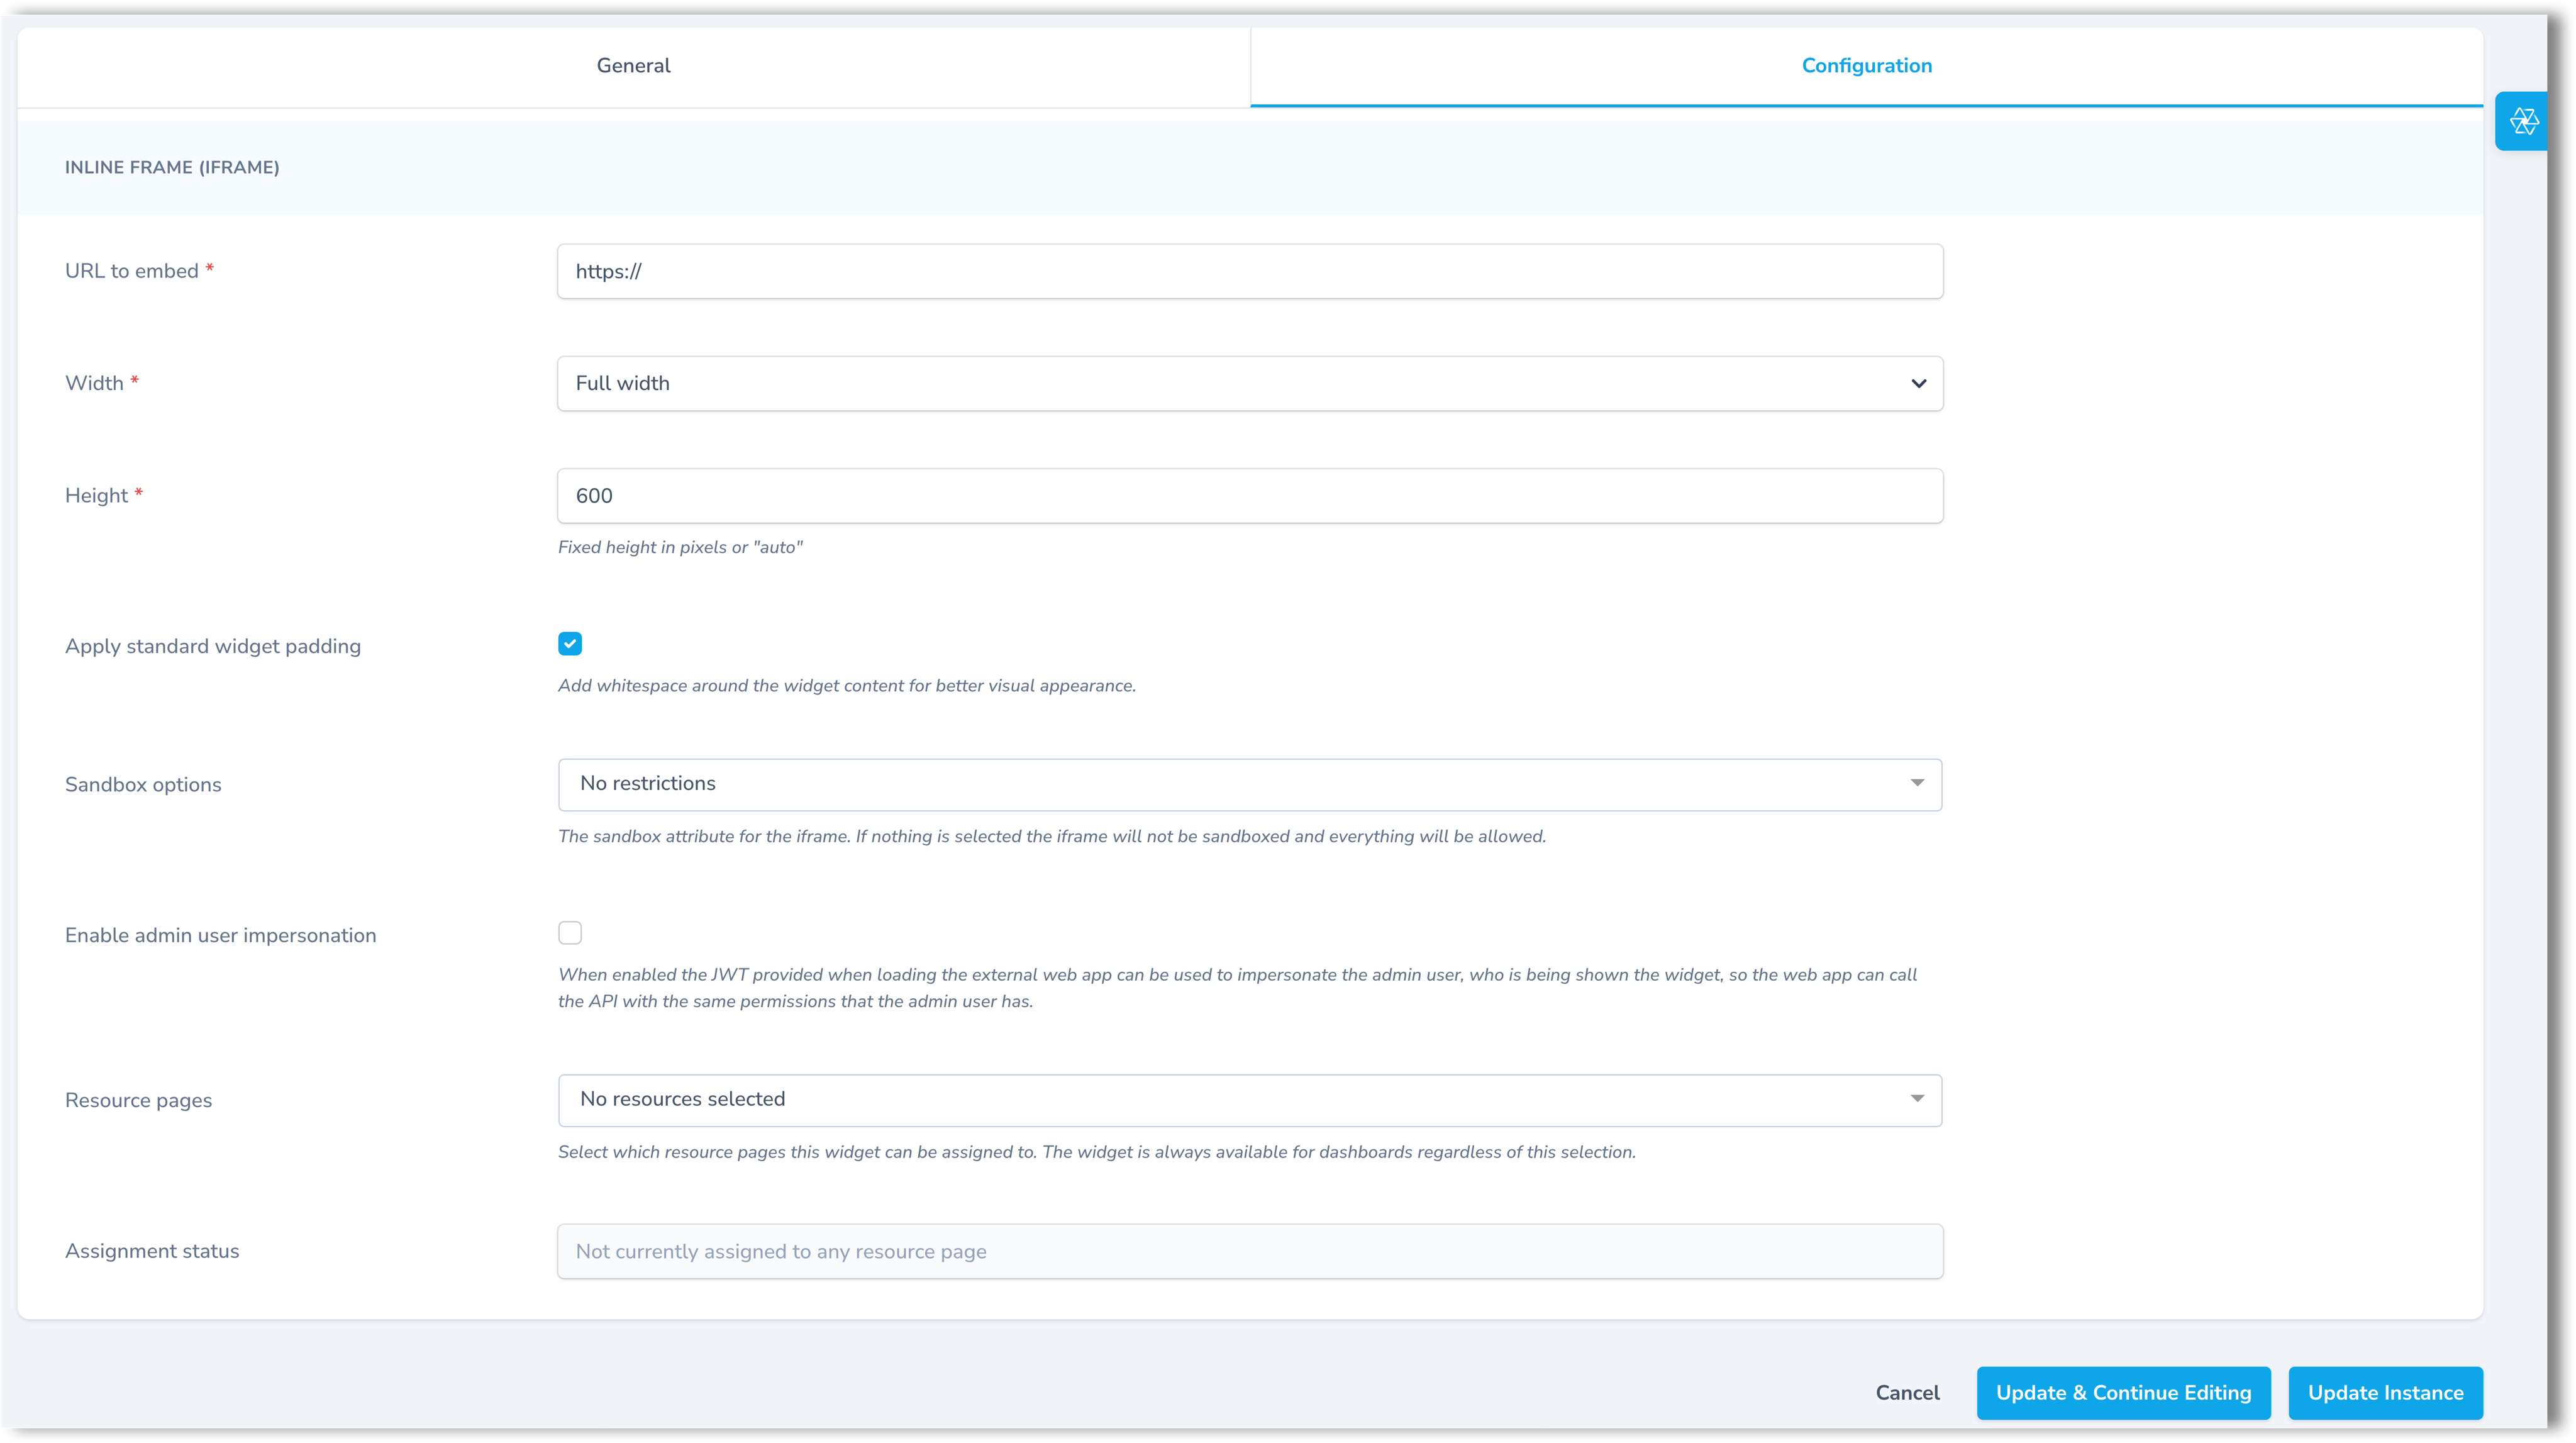
- In the Configuration tab:
- In the URL to embed* field, enter the URL of the web page or application you want to display in the widget. Note that only
https://URLs are supported as HTTPS encrypts traffic and is more secure than HTTP.
Below is an example of embedding Google Maps to illustrate which URL to copy:
- In the URL to embed* field, enter the URL of the web page or application you want to display in the widget. Note that only
Example
Go to Google Maps, find a location, click Share and then select Embed a map. From the Copy HTML field, copy the URL from
src="...". Do not include the full<iframe>tag.
ImportantNot all websites allow embedding. Some websites block being loaded inside an iframe through their security settings. If a widget shows a blank area or a Refused to connect error, the website you are trying to embed likely does not allow it. Check if the website offers a dedicated embed or share URL.
- From the Width* drop-down menu, select the layout width of the widget. You can choose between Full width and 1/3.
TipDashboards and resource pages use a three-column grid with no row limit. In other words, columns are fixed (3) but rows can grow as needed.
If a widget is Full width, it spans all three columns of the row, while 1/3 means the widget spans one of the three columns.
- In the Height* field, set a height for the widget in pixels. The default value is 600px. To allow the widget to adapt to the content's size, type
auto. - Standard widget padding is applied by default. To remove it, unmark the Apply standard widget padding checkbox.
NoteStandard widget padding adds 24px of whitespace on all sides of the widget card, so the iframe content doesn't touch the card edges.
- From the Sandbox options drop-down menu, select what the embedded page is allowed to do inside the iframe. You can select multiple options. For more details about the available options, see the expandable section below.
Sandbox options
- Run scripts — Allow JavaScript inside the iframe (needed for interactive embeds).
- Submit forms — Allow form posts from the iframe (login/search forms, etc.).
- Open modal windows — Allow the iframe to show dialogs or overlays.
- Treat as same origin — Relax cross-origin rules so the iframe can interact as if from the same site (only when you trust the source).
- Lock screen orientation — Allow the iframe to request a fixed orientation (mostly for media/presentations).
- Use Pointer Lock API — Allow mouse capture for rich interactions (maps, games, 3D viewers).
- Allow popups — Allow the iframe to open new tabs/windows (for example, "Learn more" links).
- Allow popups without inheriting sandbox — Allow popups to open without the sandbox restrictions (use with caution).
- Start presentation session — Allow casting or presentation features.
- Navigate top-level context — Allow the iframe to redirect/replace the parent page.
- Navigate top-level (user-initiated only) — Same as above, but only on explicit user action (safer default).
ImportantIf you don't select an option, the iframe will have no restrictions.
- Select the Enable admin user impersonation checkbox if you want the widget to act as the currently logged-in user when calling the back office for personalized data and actions. The widget never sees credentials; it receives a short-lived JSON web token (JWT) instead that confirms the admin user's identity and permissions.
Below is an example of a custom widget using user impersonation to display personalized data.
Example
A widget shows the admin user the pending approvals they are responsible for (for example, session refunds and partner invoices), plus Approve/Decline actions.
When the checkbox is selected:
- The admin user opens the dashboard and the My pending approvals widget appears.
- The system confirms who the admin user is and loads only their items.
- The widget lists pending approvals with key details (date, amount, partner/site).
- The admin user clicks Approve or Decline on an item.
- The list updates instantly and the action is recorded under the admin user's name.
If the checkbox is not selected, the widget can still show general information, but it won't load the items assigned to the user or allow actions.
- From the Resource pages drop-down menu, select the pages where this widget can appear. You can select more than one. This makes the widget eligible for those pages. For detailed steps on adding a widget to a resource page, see Adding widgets to resource pages in the back office.
- (Read-only) The Assignment status field shows which resource pages the widget is currently placed on. Not currently assigned to any resource page means it hasn't been added to a page yet, though it may still appear on dashboards.
TipChanges to widgets may take a few minutes to appear on dashboards and resource pages due to caching. If an update doesn't show, refresh the page or check back shortly.
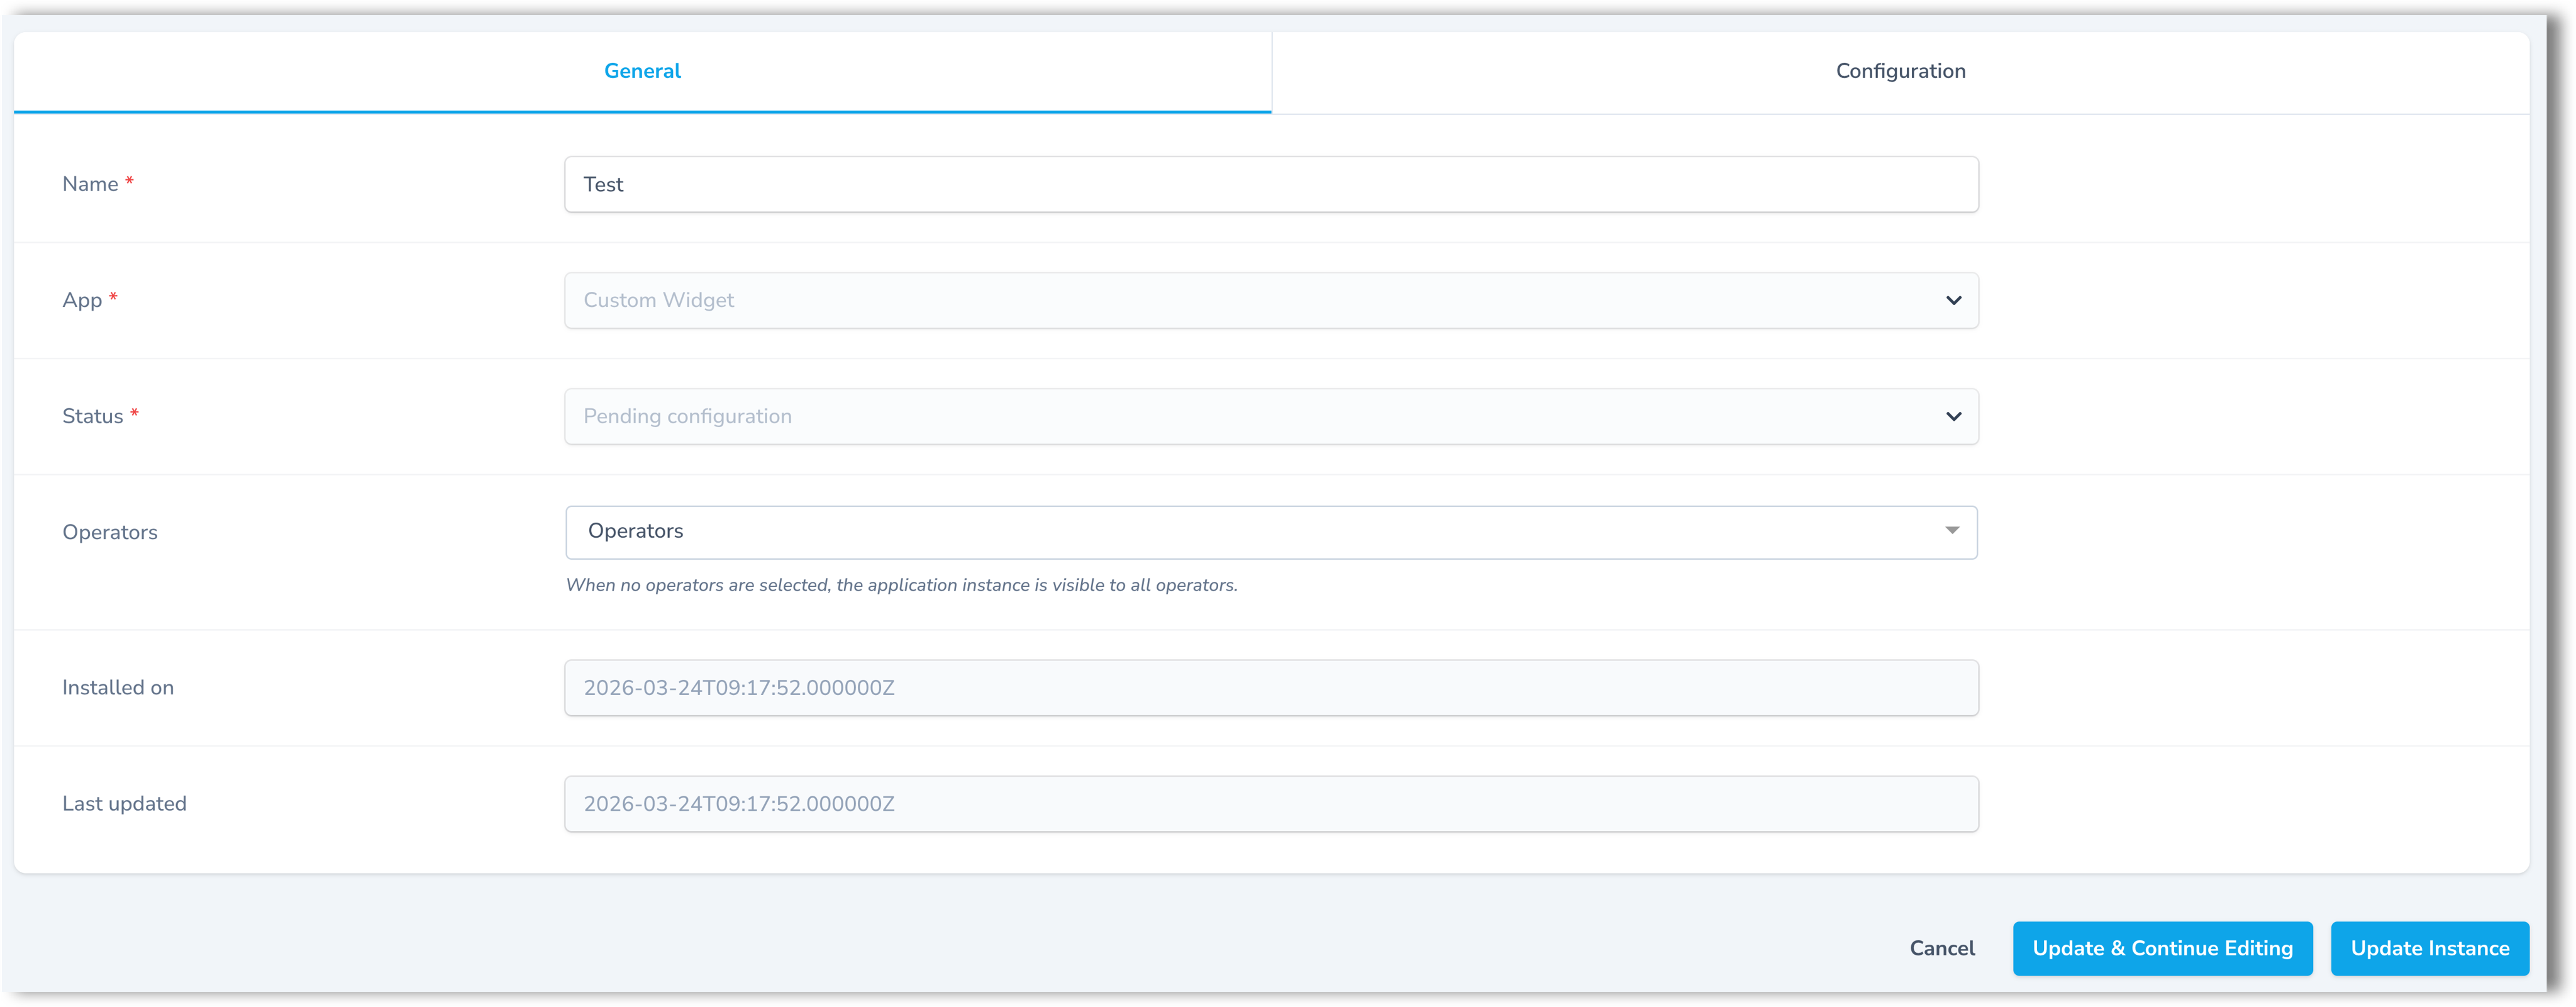
Once you've adjusted the settings in the Configuration tab, switch to the General tab to set operator access and review the instance details:
- In the Name field, you can update the name of the app instance. This is the name you entered during installation.
- (Read-only) The App field displays the name of the parent application.
- (Read-only) The Status field shows the current installation status of the app instance (for example,
InstalledorPending configuration). - Leave the Test mode checkbox unchecked for a live instance, or select it to mark this as a test instance. This setting applies to the app instance as a whole, not to individual widgets.
NoteThis setting tells the Marketplace billing system how to bill the app. It has no effect on how a widget looks, where it appears, or who can see it. Leave it unchecked unless advised otherwise.
- From the Operators drop-down menu, select which operators should have access to the widget. You can select one or more operators.
- If no operators are selected, the widget is available globally — all operators can add it to their dashboards and resource pages.
- If specific operators are selected, a separate widget instance is created for each selected operator. Only those operators can add the widget to their dashboards and resource pages.
NoteThe Operators field is only editable for users with a Global type role. If you have an Operator type role, your operator is preselected and cannot be changed.
- (Read-only) The Installed on field shows when the app instance was installed and by which admin user.
- (Read-only) The Last updated field shows when the app instance was last modified and by which admin user.
- Click Update instance.
Next steps
Once the custom widget is created, you need to add it to a dashboard or a resource page. For more details, see Creating custom dashboards in the back office and Adding widgets to resource pages in the back office.
Updated about 1 month ago